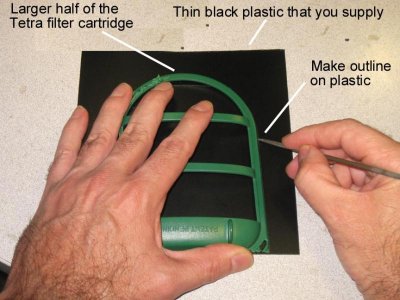
Continue:
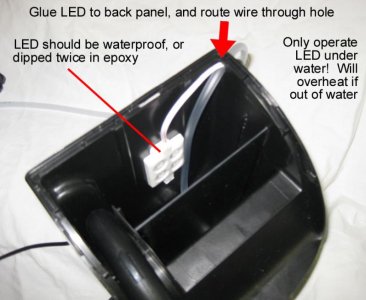
To dip your own LED in epoxy, first solder your wire to the LED. Then clean the solder flux off, using alcohol and a toothbrush; then clean again with fresh alcohol to get all residue off of the LED and the first 6" of wire. Then dip the LED and the first ½" of wire into clear epoxy such as Devcon 30 Minute, and let harden over night. Then dip again in new epoxy, but this time go further up the wire, about 2". Let dry over night again. Now epoxy your LED into position so that it shines on the middle of the algae attachment surface.
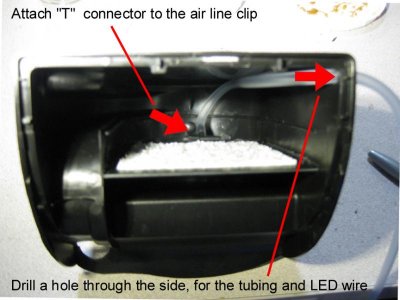
ONLY OPERATE THE LED UNDER WATER. It will overheat and melt the filter box if you leave the LED on without water. You can turn the LED on for just a few seconds to make sure it works, but any longer than this needs to be underwater only. After the LED is in place and the wire routed through the hole in the side of the filter box, silicone the hole on the inside and outside, to keep the water inside when it is bubbling. LED drivers are isolated power supplies, so they are safely able to power the LED under water.
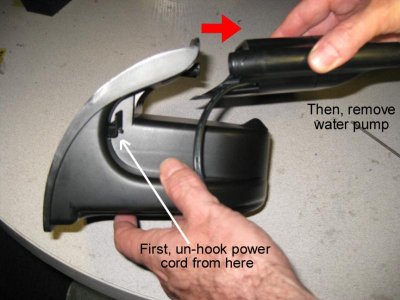
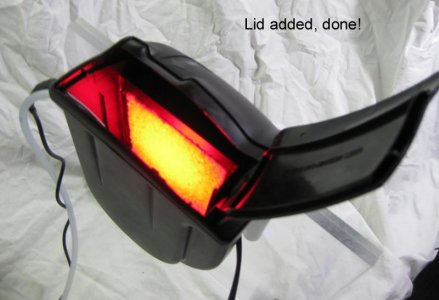
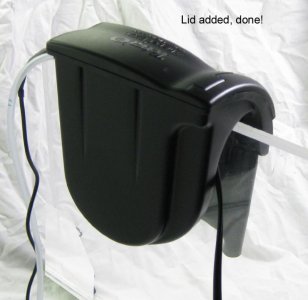
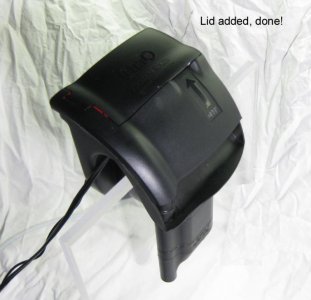
Now snap the lid on the filter box, and put the water pump back on, and it is ready to use! Like all algae scrubbers, start at 18 hours/day of light, but run the water pump 24/7. Also, if you don't see some brown growth within a week or so, you may need to shade the LED so it is not too bright; this can be done with smaller pieces of black plastic put inside the filter box. And now, final pics below.
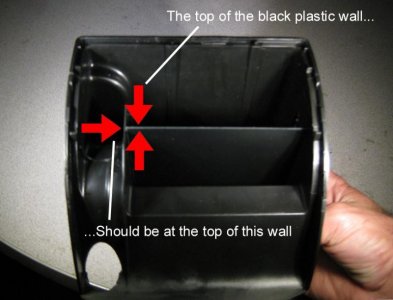
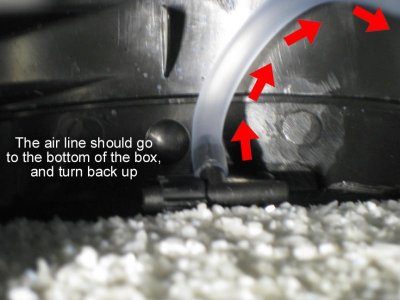
Air bubbles will go up the LED-side of the plastic wall you put in, and water will go down and under the wall, so that no bubbles get out. Almost all red light will be blocked from getting into the aquarium because the black surfaces won't reflect it. And harvesting (cleaning) is done simply and easily by just lifting the hinged lid; no need to take anything apart.
Variations: The first mods that you may want to consider are ones to make the scrubber more quiet. You can always try it as-is first, and add the mods later if needed. The way it currently is, the sound of the bubbles comes through the walls of the plastic filter box. Of course you can reduce air flow, such as at night if it's near your bed, but the best results are always with more bubbles, not less. You could also use an aquarium airstone, which would make smaller bubbles and thus be more quiet, but an airstone will need periodic cleaning when it clogs with growth.
The first way to reduce the bubble sound is to thicken the walls by adding epoxy to them, or maybe, epoxy and gravel. To do this, you would coat the inside of the entire compartment with epoxy, and maybe even do so more than once. The thicker, the better (weight does not matter).
You could also try doing this to the lid, but you will need to make sure the lid can still fit. One way to try this is to use reef-putty: put a thin layer all over the bottom of the lid, then lay a sheet of plastic sandwich wrap over it, and press it into position on the filter box; when it is dry, pull the plastic wrap off and the putty will have taken the shape of the internal parts such as the water tube.
Next you could add some sound-absorbing material to the inside of the lid; this well help reduce sound from reflecting down through the water drain area into the aquarium. Black polyester felt, maybe 1/8" thick, glued to the bottom of the entire top part all the way to the end of the water path, will absorb a lot of the reflecting sound inside. Just make sure the lid fits before gluing anything in place.
Lastly you could try to seal the crack where the lid opens up. One way is to put some black silicone along the crack, and then lay a sheet of sandwich plastic wrap over the opening, and then close the lid. When the silicone dries, remove the plastic wrap and the lid should fit tight with no gaps.
The other variation might be a removable screen/wall: Instead of gluing the plastic wall in, just slide it in the slots where the green filter basket slid into. It probably would need to be a tight fit, because it may want to pop up on it's own. With this removable screen/wall, you could remove just screen for cleaning, instead of the whole filter box. However you'd still need to take the whole filter box to the sink when you need to brush out the insides.
So, post your build and growth pics here, so we can all see how it is going!